Barney Bahle
Junior Member
Dynali uses the 912.Are there any small helicopters based on the Rotax 915 engine?
Dynali uses the 912.Are there any small helicopters based on the Rotax 915 engine?
This A.M. local EST they are inJust tracked. Bolts left Honolulu about 4 hours ago.
| 02/23/2022 9:42 P.M. | On the Way Import Scan Botany, Australia |
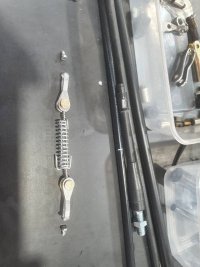
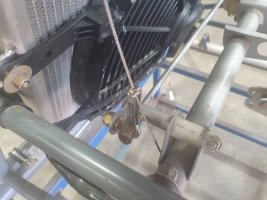
For terminating wire rope there are barrel-shaped ends that tighten with a set screw. Smaller size is used on bike cables...maybe some for motorcycles may be larger.Whilst I'm contemplating how to safety wire the main clutch bolt, I started to close off some other loose end. When the project nears completion, you discover a myriad of these "loose ends". As the saying goes, the final 10% takes another 90% of effort!
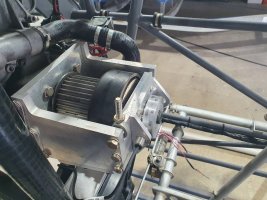
I tackled the throttle cable today. The stock Yamaha cable is not long enough, so I sourced some cable termination "goodies", and this time, a THANK YOU shout-out to Steve White, aka De Fault, whom I traded my Bensen B-80 plans library to, for a spare Yamaha throttle cable and original oil filter. These items are not available in Oz, so he sent me the items from Canada. With all the spares, and a longer outer jacket, I made up a custom length cable assembly, retaining the original engine and frame end fittings.
An issue I came up with, I interpreted one must be able to gain full throttle twist travel, without needing to lift the collective. But then there is the correlator action that is added to the travel when you do lift the collective lever. You can then run into the issue that with correlator action plus full throttle twist, the cable travel bottoms out. I had to come up with some over-travel solution, so finding inspiration from some tent guy ropes I have, I constructed a small safety spring that gives the same over-travel as the correlator travel. I'm adding this to the throttle cable circuit.
Looking for the correct crimping tool, to crimp the stainless ball onto the wire rope.
Cheers, Francois.
For terminating wire rope there are barrel-shaped ends that tighten with a set screw. Smaller size is used on bike cables...maybe some for motorcycles may be larger.
smiles,
Charles
I too remember that.I recall a friend with a helicopter on floats that was doing auto rotations with a power recovery who pulled the end of of the cable and had a landing that required repairs before being flown again.
I recall a friend with a helicopter on floats that was doing auto rotations with a power recovery who pulled the end of of the cable and had a landing that required repairs before being flown again.
It reads like you are doing well Francois.Vance, exactly what would give me sleepless nights. On the throttle end, I used the larger brass barrel ends with a small hole through it. I then drilled a recess pocket in the one end. Next I put a smaller brass barrel onto the wire rope, and crimped in on with considerable force, in fact, I stuck it under my press. I then filed that crimped on end down to fit into the recess pocket in the larger barrel. After threading the wire rope through the hole, and with the small crimped end seated into the pocket, I soldered the pocket closed. I pull tested it to 60lbs. Let's hope it stays secure in there.
Cheers, Francois.
It reads like you are doing well Francois.
My experience with motorcycles suggests it is best to have the stop at the control so the cable doesn't become the stop.
In your case that would be at the twist control on the collective rather than at the carburetor.
You welcome Francois; my helicopter experience is limited.Vance, makes perfect sense, but I have an extra layer to contend with, being the throttle correlator. I currently do have the throttle twist control travel limited to slightly less than the throttle body travel, so this control alone will never load up the cable joints. But when I lift the collective, it adds a little throttle as well, so I now run into the situation where if I set up the max travel to be twist plus correlator, when the collective is down, I cannot twist the throttle up to max. Do I need this, maybe not, I hope some experts chime in here. Am I being over pedantic to expect possibly needing to go full throttle, at low collective? My initial thoughts were "No", but what if I require the engine to spool back up fast before I load up the pitch, would full throttle not be the best way to do it? Return comments on this will be appreciated.
This is why I put in the over-travel spring setup, to allow 99% full travel by twist only, and when raising the collective from that point, the spring allows me the over-travel. BTW, the spring is set to be slightly more stiff than the throttle action required, and it's travel is more than what the correlator can add, so I still do not end up with a situation of a solidly bound up cable.
Your always wise advise and comments are highly appreciated.
Cheers, Francois
You welcome Francois; my helicopter experience is limited.
The correlator was part of the problem in my friend's mishap.
I admire your tenacity and thoroughness.
Thank you for taking us along on your wonderful adventure.
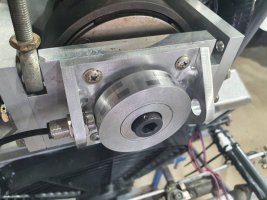
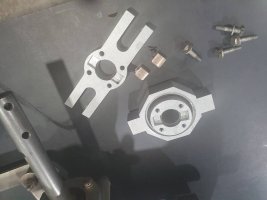
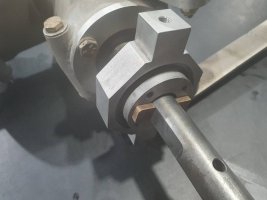
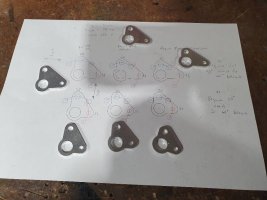
Absolutely right, sometimes you have to just make it and see what it feels like. I had to do this multiple times on my coax. Yes you can draw it on cad but there's no substitute for real conditions. You may alter it again after 5 minutes of flight as muscle fatigue can play a part for example. Wish I had a CNC router to make parts, maybe one day.I find that when it comes to the human factors part of CAD design, it's just not possible to get the correct "feel" for it from your CAD models. Even animating the actions, you cannot feel how it's going to feel in your hands. So to get my throttle collective correlator ratio correct, I CNC routered out 6 different ratios. They are a press-fit onto the shaft, so by interchanging them and sliding them up and down the shaft, I should be able to get the correct feel and ratio. By feel I mean, to use a comfortable amount of wrist twist, to give the correct mechanical travel at the throttle body end. Too much twist and you need to double take, move your hand grip onto the collective shaft in order to get enough turn out of it, too little twist and the throttle is too sensitive.
More later...... Cheers, Francois.

How long is your to do list before any rotor run ups can take place ?