What’s New & Updated
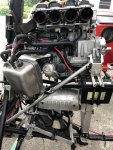
Photo 8534
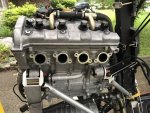
- 2003 RX1 Carbbed YG4 with 300 miles
- Improved wiring
- single battery +/1 leads
- improved ground strap configs
- oil lines trimmed
- new clamps and some hoses
- throttle cable and plug wires in one sheath, wires routed over head instead of along the top of the outer edge.
- improved wire routing and reduction in number of individual sheathed lines
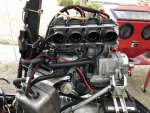
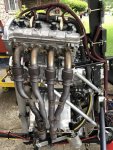
Photo 8535 shows improved wire loom from exhaust side, and routing over head with throttle cable instead of along with EGT leads
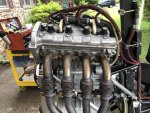
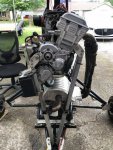
Photo 8536 Front view of much improved wire loom routing
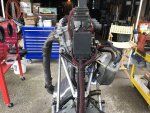
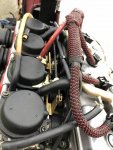
Photo 8537 of 3-speed Radiator Fan, powered through fuse box,10A, with power lead from ignition switched relay. No coolant heat probe installed at this time. The fan will switch on with the ignition and run constantly at low. Two panel toggles to engage medium and high speed for testing and experimental purposes.
I nevr had a problem with the radiator mounted like this running at speeds up to 90 MPH (the VNE anyway) for extended periods, although I did notice the engine ran hotter over 85 MPH. This was at ERPM ~8200-8500, with the 2.72:1 MAC Silent Drive with Hy-Vo chain.
When I built Kurt Carleson's 140 HP YG4 single place Air Command CLT, he reported that after switching out sprag clutched Arrow PSRU (2.72:1) for the Air Trikes SPG4 (3.01:1) the engine ran at higher ERPMs for the same IAS, and that temps went up. It is my understanding that Kurt installed a fan athat reduced effective cooling, and then re-installed the radiator vertically on the engine support legs in the traditional manner.
I like the angled, laid-down look, and am hoping on perfecting it with this installation for the 3:1 PSRU which provides more reach into the upper ERPM limits to grab more TO and climb HP.
Photo 8538 shows the thermostat housing down low, underneath the engine. The hot hose with yellow strip must be removed during filling, then replaced. When the engine reaches running temps 160°<180° and the valve opens, air trapped in the thermo housing to migrate to the top of the line, and burp out the reservoir (Not installed in this photo yet, to be at top right of head in this pic.)