Genesis--In the Beginning--Chapter 1

Yaw Mon... It was a party and considering that this small portion is what we can tell as what happens at B-Days stays in B-Days.

It was one of the best trips I've ever had!!!

You guys got to come this year join us for the fun!!
 
Oh lord, now there are the pics, I will never forget gabor showing me the Camera, and saying want to see what the F-ing hold up is. here is the f-ing hold up. he showed me the camera. but the light was reflecting on it and I thought someone had run over john and he was stuck under the car. then it was explained to me John's attempt to jump the Ditch.
I was laughing so hard my eyes where watering.

then I got the play by play from Stan.
 
Ah... it will be fine!!!

AHahahahahahahahahaha

We were all crying from laughing so hard and I'll never forget as we were in the air and Stan's wide eyes as we saw what was on the other side of the jump!
 
I had to cut some internal reinforcing sleeves to slide inside the frame rails. My disc sander put a chamfer on the ends so they would slide in nicely. Once they are at the proper depth, I drill a pilot hole through them, followed by a 3/16 inch bit.

The large plans along with the build videos help sort out the pile of parts.


Stan
 

Attachments

  • Feb18 009.jpg
    Feb18 009.jpg
    134 KB · Views: 4
  • Feb18 010.jpg
    Feb18 010.jpg
    118.2 KB · Views: 4
  • Feb18 008.jpg
    Feb18 008.jpg
    134.5 KB · Views: 4
  • Feb18 012.jpg
    Feb18 012.jpg
    109.5 KB · Views: 4
  • Feb18 014.jpg
    Feb18 014.jpg
    125.7 KB · Views: 4
  • Feb18 015.jpg
    Feb18 015.jpg
    133.5 KB · Views: 4
  • Feb18 016.jpg
    Feb18 016.jpg
    130.5 KB · Views: 4
I got out early today and started fabricating the rudder pedals. This involved cutting angle aluminum in my chop saw, laying out, drilling, riveting.

I got to use my clecoes as I made my rudder pedals. Handy tool to have.


This kit has exceeded my expectations. I had to download a driver to watch the build videos. These videos have Nicolas showing techniques for laying out and making this project so much easier. I dont know how many hours I spent on my Helicycle trying to figure out what goes where. The Helicycycle has excellent factory support, and very nice components, and excellent videos as well....quite a few of them. They just need to include nice drawings like Nicolas has. These drawings are so large that you can hold the parts up them as you build.

Got to get back to cutting aluminum.

Stan
 

Attachments

  • Feb19 001.jpg
    Feb19 001.jpg
    114.4 KB · Views: 3
  • Feb19 002.jpg
    Feb19 002.jpg
    136 KB · Views: 3
  • Feb19 004.jpg
    Feb19 004.jpg
    98 KB · Views: 3
  • Feb19 005.jpg
    Feb19 005.jpg
    129.4 KB · Views: 3
  • Feb19 012.jpg
    Feb19 012.jpg
    133.2 KB · Views: 3
  • Feb19 016.jpg
    Feb19 016.jpg
    112.5 KB · Views: 3
  • Feb19 011.jpg
    Feb19 011.jpg
    130.4 KB · Views: 3
  • Feb19 008.jpg
    Feb19 008.jpg
    133.8 KB · Views: 3
Buddy way to build!!!
This is look'n soooo good, as always with you.
 
Heres the rest of the rudder pedals. I had to rivet the flat plate to the aluminum angles. I used an iron bar for a bucking bar, then hammered them home. I dont have a rivet squeezer, but I like hammering them anyway. The hammer draws the pieces together and does a nice job. Reminds me of my farming days. Our 24 foot grain head had to have all the sickle sections replaced and they were all riveted. If you broke one in the field....out came a big hammer...bucking bar...and the rivets. I never had one come loose.

By the way.....when I take this all apart prior to going to the powder coater.....each and every part will have their corners radiused....and the edges chamfered. This will just look better, and not having sharp corners will make the powder coating less likely to wear off.

Man, this has been a rough week on my hands! Between the stairway I am laminating...all this aluminum work,...and doing some stuff to my Helicycle.....and all my wifes honey doos........its a wonder I have any skin left!

Stan
 

Attachments

  • Feb19 016.jpg
    Feb19 016.jpg
    112.5 KB · Views: 4
  • Feb19 017.jpg
    Feb19 017.jpg
    108.9 KB · Views: 4
  • Feb19 019.jpg
    Feb19 019.jpg
    134.1 KB · Views: 4
  • Feb19 020.jpg
    Feb19 020.jpg
    129.6 KB · Views: 4
  • Feb19 021.jpg
    Feb19 021.jpg
    135 KB · Views: 4
  • Feb19 025.jpg
    Feb19 025.jpg
    135.8 KB · Views: 4
  • Feb19 026.jpg
    Feb19 026.jpg
    131.6 KB · Views: 4
  • Feb19 028.jpg
    Feb19 028.jpg
    134.5 KB · Views: 4
Last edited:
You'll have that first part finished in no time. What's the estimated time of delivery for the next part? Let me guess, 2 weeks.
 
Hi Stan, I am enthralled again with your build.
I knew the Genesis was the ultimate when I first saw the video of it.
I could tell by Nicolas' posts that he is a straightshooter and is very proud of his bird.
I hope he does well, I know you will do him proud. You will have an outstanding example, I am sure.
 
Wow you are making head ways big time Stan. I go out for a day to have fun and when I get home you have a halfway done gyro!!!
 
Wow you are making head ways big time Stan. I go out for a day to have fun and when I get home you have a halfway done gyro!!!
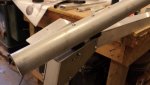
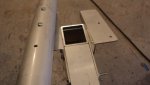
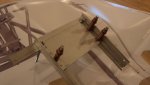
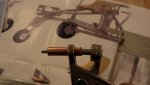
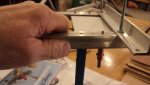
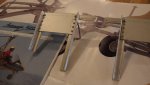
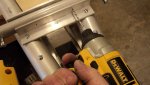
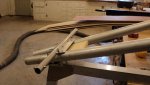
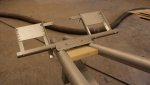
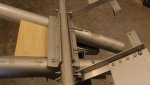
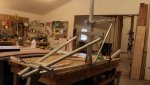
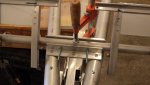
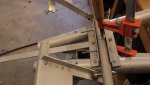
I know, Gabor = Stan really does gnaw aluminum!:cool:
 
Looking great Stan! Haven't had much a chance to get on here this weekend but wow what a great read! I'm catching up. :) I'm off to go flying! Happy Sunday.
 
Stan, Are you going to fit everything together and then take apart and finish the edges remove sharp corners etc?
So far it looks really good! :D
 
Stan, the most enjoyable thread for along time, next to the Hollmann's and the Behemoth. Meticulous craftsmenship. A delight to watch.

Kai.
 
Don't forget the purple polish Stan. Got mine the other day. Really good stuff and should be great on this gyro.
 
Came in early this morning....and more work being done on the Genesis. This frame is going fast...but its like framing up a house. The shell is 90% of the volume...but takes only about 10% of the time. There will be a LOT more to this build of course. I cant wait to start fabricating the whole tail. I opted not to on my SparrowHawk, but I wish I had built it now for the experience.


Stan
 

Attachments

  • Feb19 029.jpg
    Feb19 029.jpg
    139.6 KB · Views: 4
  • Feb19 031.jpg
    Feb19 031.jpg
    131.1 KB · Views: 4
  • Feb19 038.jpg
    Feb19 038.jpg
    136.8 KB · Views: 4
  • Feb19 039.jpg
    Feb19 039.jpg
    134.3 KB · Views: 4
Top