Brothers Gyrobee build!

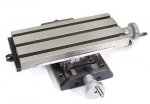
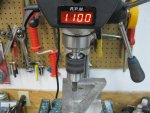
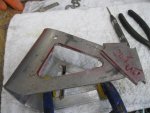
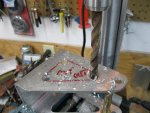
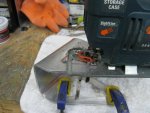
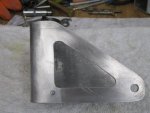
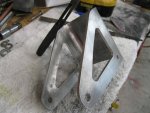
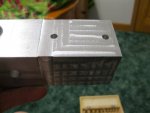
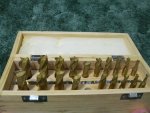
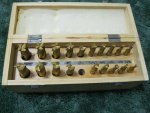
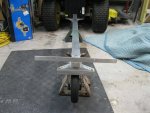
This is another interesting build thread. I am interested seeing how your milling vice works out for you. Thanks for starting this educational thread. Stan
 

Attachments

  • 480_2008.jpg
    480_2008.jpg
    15.8 KB · Views: 0
Last edited:
Being off for the rest of the year has it's down falls, I didn't have any help today and I thought I would work on 2 things.

1st. being the nose assy.
I sat down and marked all the areas out that I was going to have to do.
then I started by drilling the 1/2" hole for the AN6 bolt that holds the front wheel on. Then I took the 3/4" bit and drilled a lighten hole about 3" into the end that goes into the 2" FWD keel. then I layed out the bolt holes into both the front keel and the nose block.
I when aheadand started the 2 AN3 bolts that hold the rudder pedal bracket.

Then I started laying out my brackets for my tall tail ends...

When my stuff comes in to do the milling I will work on it again
 

Attachments

  • An-6 hole .jpg
    An-6 hole .jpg
    127.6 KB · Views: 2
  • IMG_0349.jpg
    IMG_0349.jpg
    110.5 KB · Views: 2
  • IMG_0332.jpg
    IMG_0332.jpg
    103.9 KB · Views: 2
  • light hole.jpg
    light hole.jpg
    116 KB · Views: 2
Last edited:
I started working on my tall tail blocks that will go into the 2" tubing used as the spar . Like i said when the parts come in to try to do some milling.:confused:
 

Attachments

  • IMG_0350.jpg
    IMG_0350.jpg
    107.2 KB · Views: 1
  • Tal tail ends1.jpg
    Tal tail ends1.jpg
    112.2 KB · Views: 1
Well my brother came down the the house and cut a few more things while waiting on some more 1 x 1 x 3/16 angle. He started working on the rudder pedals to cut out the short pieces and the 2" angle that the pedals ride on.
Pictures tomorrow.
 
You are a good man Chris I don't care what anybody says......... LMAO
Does your bro have any previous aviation experience?
Either way it seems he is already hooked on it :)
Good job. I did love to watch you build and start flying buddy.
It was a total delight seeing you flying at Wrens!!
 
choppergabor :
You know I thought I am never going to get finished with this training. But that Friday I finished and got what I was after...... Anyway he has not had any time in anything yet.. I know where not to send him to start off. But I am hoping something will open up soon.....

Did some more work today on making the tail keel and some more cheek plates.
Well this is what "I" did today.....
Until I ran out of metal to work with...Waiting on an order to come in soon.....:tape:
got to put in a order to aircraft spruce also for some bolts, washers and nuts.
 

Attachments

  • IMG_0355.jpg
    IMG_0355.jpg
    123.9 KB · Views: 1
  • IMG_0359.jpg
    IMG_0359.jpg
    110 KB · Views: 1
  • IMG_0361.jpg
    IMG_0361.jpg
    135.3 KB · Views: 1
  • IMG_0364.jpg
    IMG_0364.jpg
    126.6 KB · Views: 1
This build brought to you by Bud Light. Real American heros! Here's to you, Mr. Gyroflyer guy. Somehow you got a lawn chair to fly with some aluminum, a few bolts, and a really big shiny twirling yard stick above your head. Macguyver would be proud. So here's to you, Mr. Gyroflyer guy!
 
Chris, your bro is a lucky guy. Having done all the research and a previous build your are extremely well placed to guide him through all the pitfalls.

I think it would be really cool to share stuff with a brother, I had a twin but he unfortunately died very young so I never knew him. I know my boys get on very well together, but the eldest who is an Airbus 330 captain thinks Stuart and I are totally wacko getting into gyro's.

I also think your second build will be better, faster, and a more enjoyable experience for you as well. It will be good to follow this build thread.:)
 
Resasi : Sorry to hear about your brother.

My brother is some 15 years younger than me and also my half brother, But I can say he is the best brother anyone could ask for. We have done a lot of things together and even built the house I now live in.......I could not have done it without him helping me and pushing me along. So yes I don't mind being A GOOD BROTHER to him. He is not only my brother but my best friend also.

So it is time to pay back some of the time he spent helping me........51 weeks it took to build my house the only things we didn't do is
1. the slab
2. the sheet rock
3. AC I paid my Sisters husband to install it.
So you see he helped a lot....:cool:

I think this will go faster because I know what the word " EXPERIMENTAL " means now!

Thanks again!
 
Last edited:
A Brother Gig!
How cool is that!!! Way to be a brother DOG!

My brother and I do almost everything together, he is not into gyro's as much as I am but he hasn't flow with Ron yet either.
 
All_In : Hey guy long time no talk too.......It's great to have someone close to you in the family also......

Building Log :
No work since Thursday went deer hunting and Just got back last night.........Wasted time but got to see 4 running across the field........ My luck no rifle. but I am happy I have a little meat in the freezer .........

Sitll waiting on metal to come in....also ordered so 100.00 worth of hardware......get her done.....
 
Last edited:
Building Log :
Well I started making the from fork assy. and found it to not so easy. But once I had the first shot of caffeine I came to me. I took 2 short pieces of a 2 x 6 and put in on the sander to round off one side of both of them
Picture #1
Then I put a piece of 6063 on the out side and placed it in the vise.....Now with a Rubber hammer and a little heat I got it to lay even with the top. Now comes the tricky part. How to get the other side down? I turned every thing around in the vise and did the same thing again, But I could only go so far. So I took a C-clamp and clamped it to the work bench flat ways and went a little farther and again I had to stop because of travel. I found a piece of 3" x 5" steel rect. square tubing. Great the curved part matched. I placed this in the Press and placed a 2 flat plate on the top where the front keel will be and cranked the 20 ton press down. Went back and got the C-clamp and brought it all the the final shape

Picture #2 I guess I should have take pictures at each step?

Picture 3 & 4 " Almost finished piece ".

Only thing left to do now is cut the lighten holes out and clean it up and mark one more thing off the list of things to make. Hey brother you need to get your :D over her and get some work done... my head is killing me... :wacko: all this thinking!

I am going to take mine front fork off and the one I just built to see if their is any difference in weight?
Need to clean the plastic washers anyway and check my axle bushing I made also.....
 

Attachments

  • my front fork 2.jpg
    my front fork 2.jpg
    134.6 KB · Views: 2
  • Front fork 3.jpg
    Front fork 3.jpg
    136.2 KB · Views: 2
  • Front fork 4.jpg
    Front fork 4.jpg
    138.9 KB · Views: 2
  • Fork wodden blocks.jpg
    Fork wodden blocks.jpg
    129.5 KB · Views: 2
Last edited:
Finished the front fork and wheel assy. (NEXT)

Finished the front fork and wheel assy. (NEXT)

Well I had some type of file bit I call it. I placed it in the drill press and tried out the new vise. Oh i went by Grainger and ordered me a 6 paddle cutting bit today it should be here Friday. I told the guy I wanted to try it before I bought on of the hig dollars ones..... Any way i had to use the jig saw to cut out the plates before I could do anything else....

OK Stan what do you think about the bit and how it works?

:rolleyes:I was very happy with the work..:rolleyes:
 

Attachments

  • IMG_0393.jpg
    IMG_0393.jpg
    130.5 KB · Views: 2
  • IMG_0403.jpg
    IMG_0403.jpg
    132 KB · Views: 3
  • IMG_0400.jpg
    IMG_0400.jpg
    132.1 KB · Views: 3
  • IMG_0401.jpg
    IMG_0401.jpg
    127.5 KB · Views: 3
  • IMG_0394.jpg
    IMG_0394.jpg
    126.2 KB · Views: 3
  • IMG_0404.jpg
    IMG_0404.jpg
    127.8 KB · Views: 3
  • IMG_0406.jpg
    IMG_0406.jpg
    131.8 KB · Views: 2
  • IMG_0409.jpg
    IMG_0409.jpg
    130.2 KB · Views: 2
Last edited:
That seems to have come out nicely Chris.
 
Resasi : Hey I thought so too! move on to the next project the Nose Solid piece of aluminum 6" long, a little heavy.


Building Log :
Went to Savannah today after I got off work to see if I could find a play toy to come home with. I did find a few things but not what I wanted really
so I came home and tried out my bits I got. I shaved off about 1/16" it slow but just might be worth it. Boy I would love to have a end mill now. the store and a mini lahte in stock but the mill is a special order item.
 

Attachments

  • IMG_0417.jpg
    IMG_0417.jpg
    136.7 KB · Views: 2
  • IMG_0418.jpg
    IMG_0418.jpg
    128.7 KB · Views: 2
  • IMG_0416.jpg
    IMG_0416.jpg
    133.7 KB · Views: 2
  • IMG_0415.jpg
    IMG_0415.jpg
    136.4 KB · Views: 1
Last edited:
Well I played around last night on the drill press with the new milling end bit. Come 20 to the set, this was the smallest set they had. So out of the 20 of them I can only use 10 of them any thing over 1/2" shank is to big for the chuck.
Also the set came with 2 flute and 4 flute bits. The 2 seems to work good but the 4 seem to no be as ruff when cutting......... :wacko:

I need to find me a bull nose bit now for making smooth or rounded ends. any suggestions? :blabla:
 
Builders log :
Well everything is coming together as you can see, I guess I have to wait until next week to get the metal I ordered. I did get a piece of 3/16" flat plate. so this is what I have done now........:D
Once i get the wheels and axle on it I will throw it on the scales to see how heavy it is getting.

Oh my Nose block turn out great. I might have been off just a hair but all and all I happy with it and not having to spend 65.00 on it either. I got to make some of the axle saddles Page 25 of the plans or figure out how to make them.....:wacko: ( any suggestions ) Got to make a big bolt order also.
 

Attachments

  • IMG_0419.jpg
    IMG_0419.jpg
    135.6 KB · Views: 3
  • IMG_0420.jpg
    IMG_0420.jpg
    126 KB · Views: 3
  • IMG_0423.jpg
    IMG_0423.jpg
    130.3 KB · Views: 3
  • IMG_0424.jpg
    IMG_0424.jpg
    120.7 KB · Views: 3
  • IMG_0426.jpg
    IMG_0426.jpg
    127.9 KB · Views: 3
  • IMG_0428.jpg
    IMG_0428.jpg
    128.4 KB · Views: 3
Last edited:
Dirty Dog,
Looks like you have a 2X2 peice mounted to the back about half way up the mast. Is that the engine mount? I am not there yet but thought I recall my plans called for this to be made out of angle. Is this a design change or just another difference between the traditional gyrobee and the starbee gyro?
 
Skyward bound :
Plans do call for angle aluminum but I like this piece just a little better and I am going to use one more thing also, I have noticed that there is a little twisting of torque on some of the bolts and the bolt hole. ( on my engine tube )
So this will help hold thing just a little more. I mainly made them for my aircraft......:) 1/2" tube solid with a 1/4" hole drill through.
 

Attachments

  • IMG_0213.jpg
    IMG_0213.jpg
    130.5 KB · Views: 4
Last edited:
Top